Okay, let's be honest, how many of you are sick of ripping your case open to mess around with jumpers every time you start overclocking and have to reset the BIOS (clear CMOS)? How many of you, like me, can't even get at the jumper because of all the junk in your case? Well, there is a stupid-simple solution (and it's cheap!)...
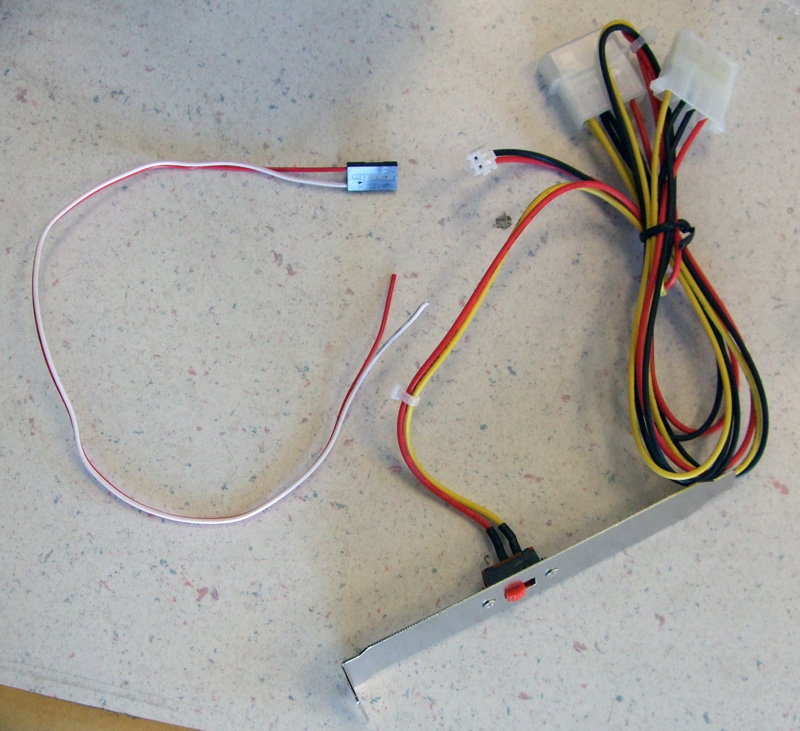
First off, you'll need a switch (I just used one of the PCI bracket switches from a CCFL kit), some wire, a connector to stick onto the CMOS clear header (I used the wire from a case's power LED), some solder, a soldering iron, wire strippers, and some heatshrink.
The next steps are pretty simple...
- Trim wires to length and test fit everything
- Solder the wires together (and make sure to cover your solder joints with heatshrink tubing)
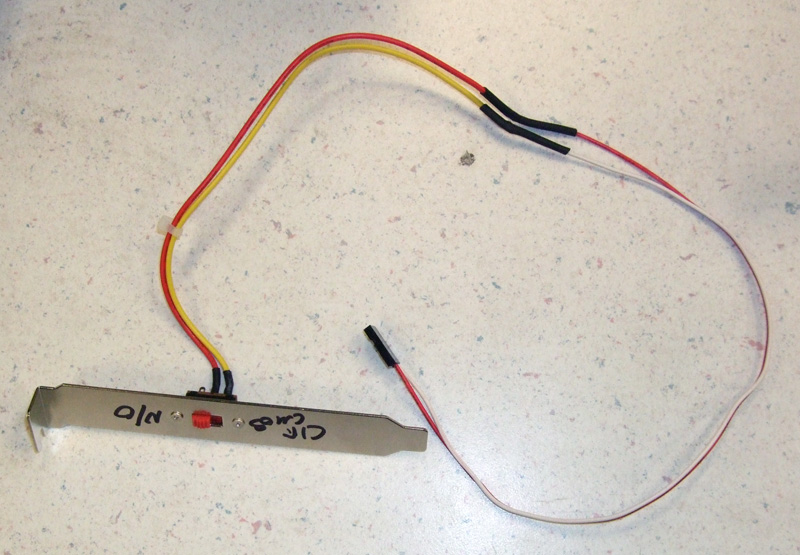
- Label the switch (for mine, I labeled one side 'N/O' (normally open) and the other 'Clr CMOS')
Some important things to note:
I'm using a Gigabyte motherboard, so my CMOS clear header is only a 2-pin on/off kind of deal (which makes this mod very simple). For motherboards that utilize 3-pin CMOS clear headers, you'll need a 3rd wire to hook into your connector. Wiring is simple: the header's center pin should be linked to the switch's center terminal and the other two pins join with either of the two remaining outer terminals on the switch (order it to match the direction that you'd like the switch to operate). Depending on the motherboard in question, the third wire may not be necessary... but, unless you're familiar with the circuit design for the CMOS clear header, it's probably best to just use the 3rd wire anyway.
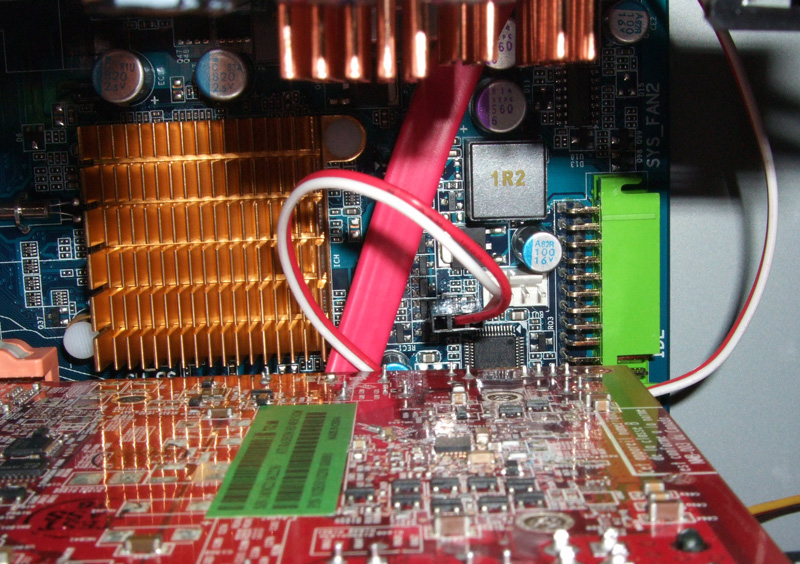
Next, you install the bracket, run the wire through the case, and connect it to the board's CMOS clear header.
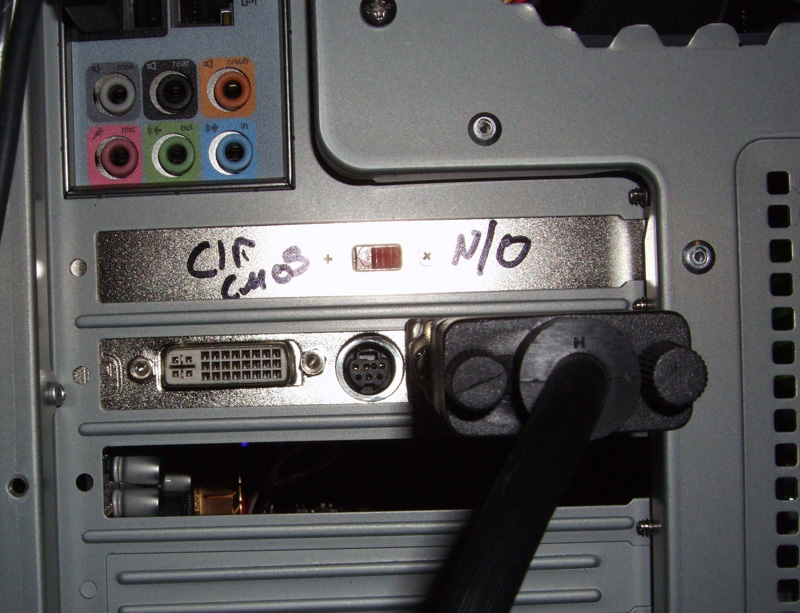
...it's that simple.
Also, for those who were wondering, it is possible to cram two loops into the top portion of an Antec P180 (reservoirs mount to the case door with velcro):
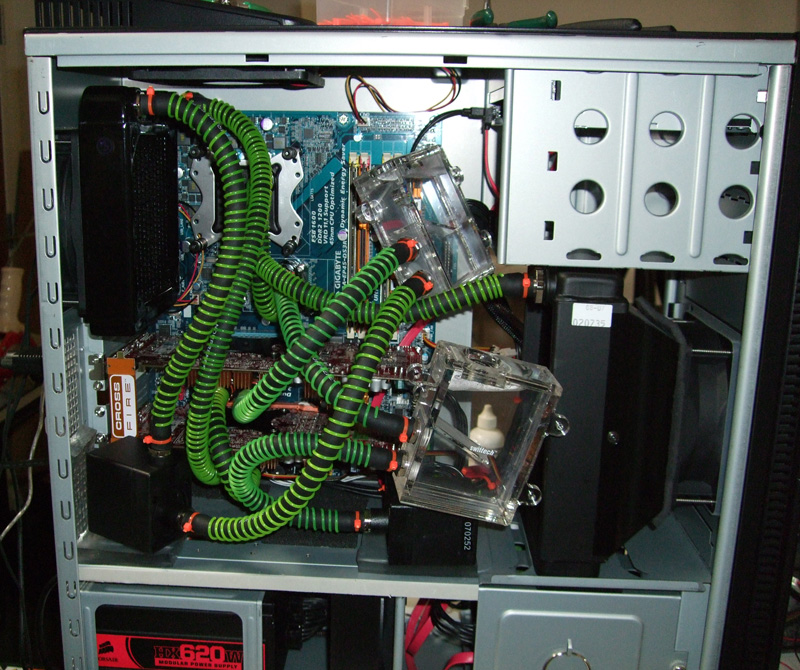
...but a single loop is a lot cleaner (even if it isn't particularly well planned out because it's just a quick conversion of the dual loop setup).
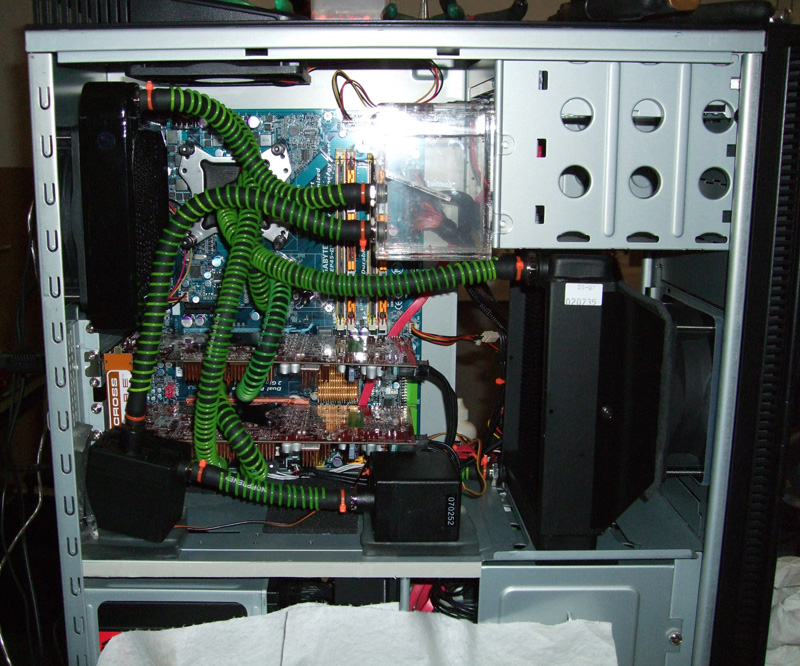
This system's aim is low-noise performance, as all of the fans (except for the 1000RPM Scythe Ultra Kaze in the front) are 800RPM Scythe S-Flex SFF21D fans and the pumps are D-Tek dB-1's ... cooling an E8400, P45 northbridge, and two ATi HD4850's in CrossFire.